Supabase Email Templates: The Complete Guide to Every Auth & Transactional Email
Supabase sends a lot of email on your behalf, and by default all of it looks like it came from 2009. The confirmation link that lands in spam, the reset-password mail that renders as a wall of plain text, the magic link that never arrives — these aren’t separate problems. They’re all the same system, and once you understand how it works you can fix every one of them.
This guide covers every email a Supabase app sends — the auth templates you configure in the dashboard and the transactional emails your own app has to trigger — plus the variables, the client-rendering traps, deliverability, and the part almost nobody writes about: keeping a dozen-plus emails on-brand and tested as your app grows.
A few things up front:
- The defaults are intentionally minimal. Supabase’s built-in templates are plain HTML with inline CSS and a subset of Go templating — no loops, limited helpers. Good enough to prove auth works; not good enough to ship.
- The built-in email sender is for testing. It only delivers to your project team’s addresses, is rate-limited hard, and not meant for production. You’ll need custom SMTP before you have real users. More on that later.
- Everything here uses real variable names and real HTML.
Jump to what you need:
- The complete map: every email a Supabase app sends
- How Supabase email templates work — your own verify route · subject lines & preheaders · logo & dark mode
- How email template deployment differs by environment — Hosted Supabase · Self-hosted Supabase · Local development (CLI)
- Each auth email, one by one — Confirm signup · Magic Link · Reset password · Invite user · Change email · Reauthentication
- Transactional & triggered emails beyond auth
- Deliverability: making them actually arrive
- Maintaining Supabase emails as your app grows
- The fast path: design & maintain them visually
- FAQ
“Supabase” is a trademark of Supabase, Inc. This guide references it descriptively; emailsforsupabase.com is not affiliated with, endorsed by, or sponsored by Supabase. Full disclaimer in the footer.
The complete map: every email a Supabase app sends
Most guides cover one template. The thing that actually helps is seeing the whole set at once, because the emails fall into two buckets with completely different plumbing.
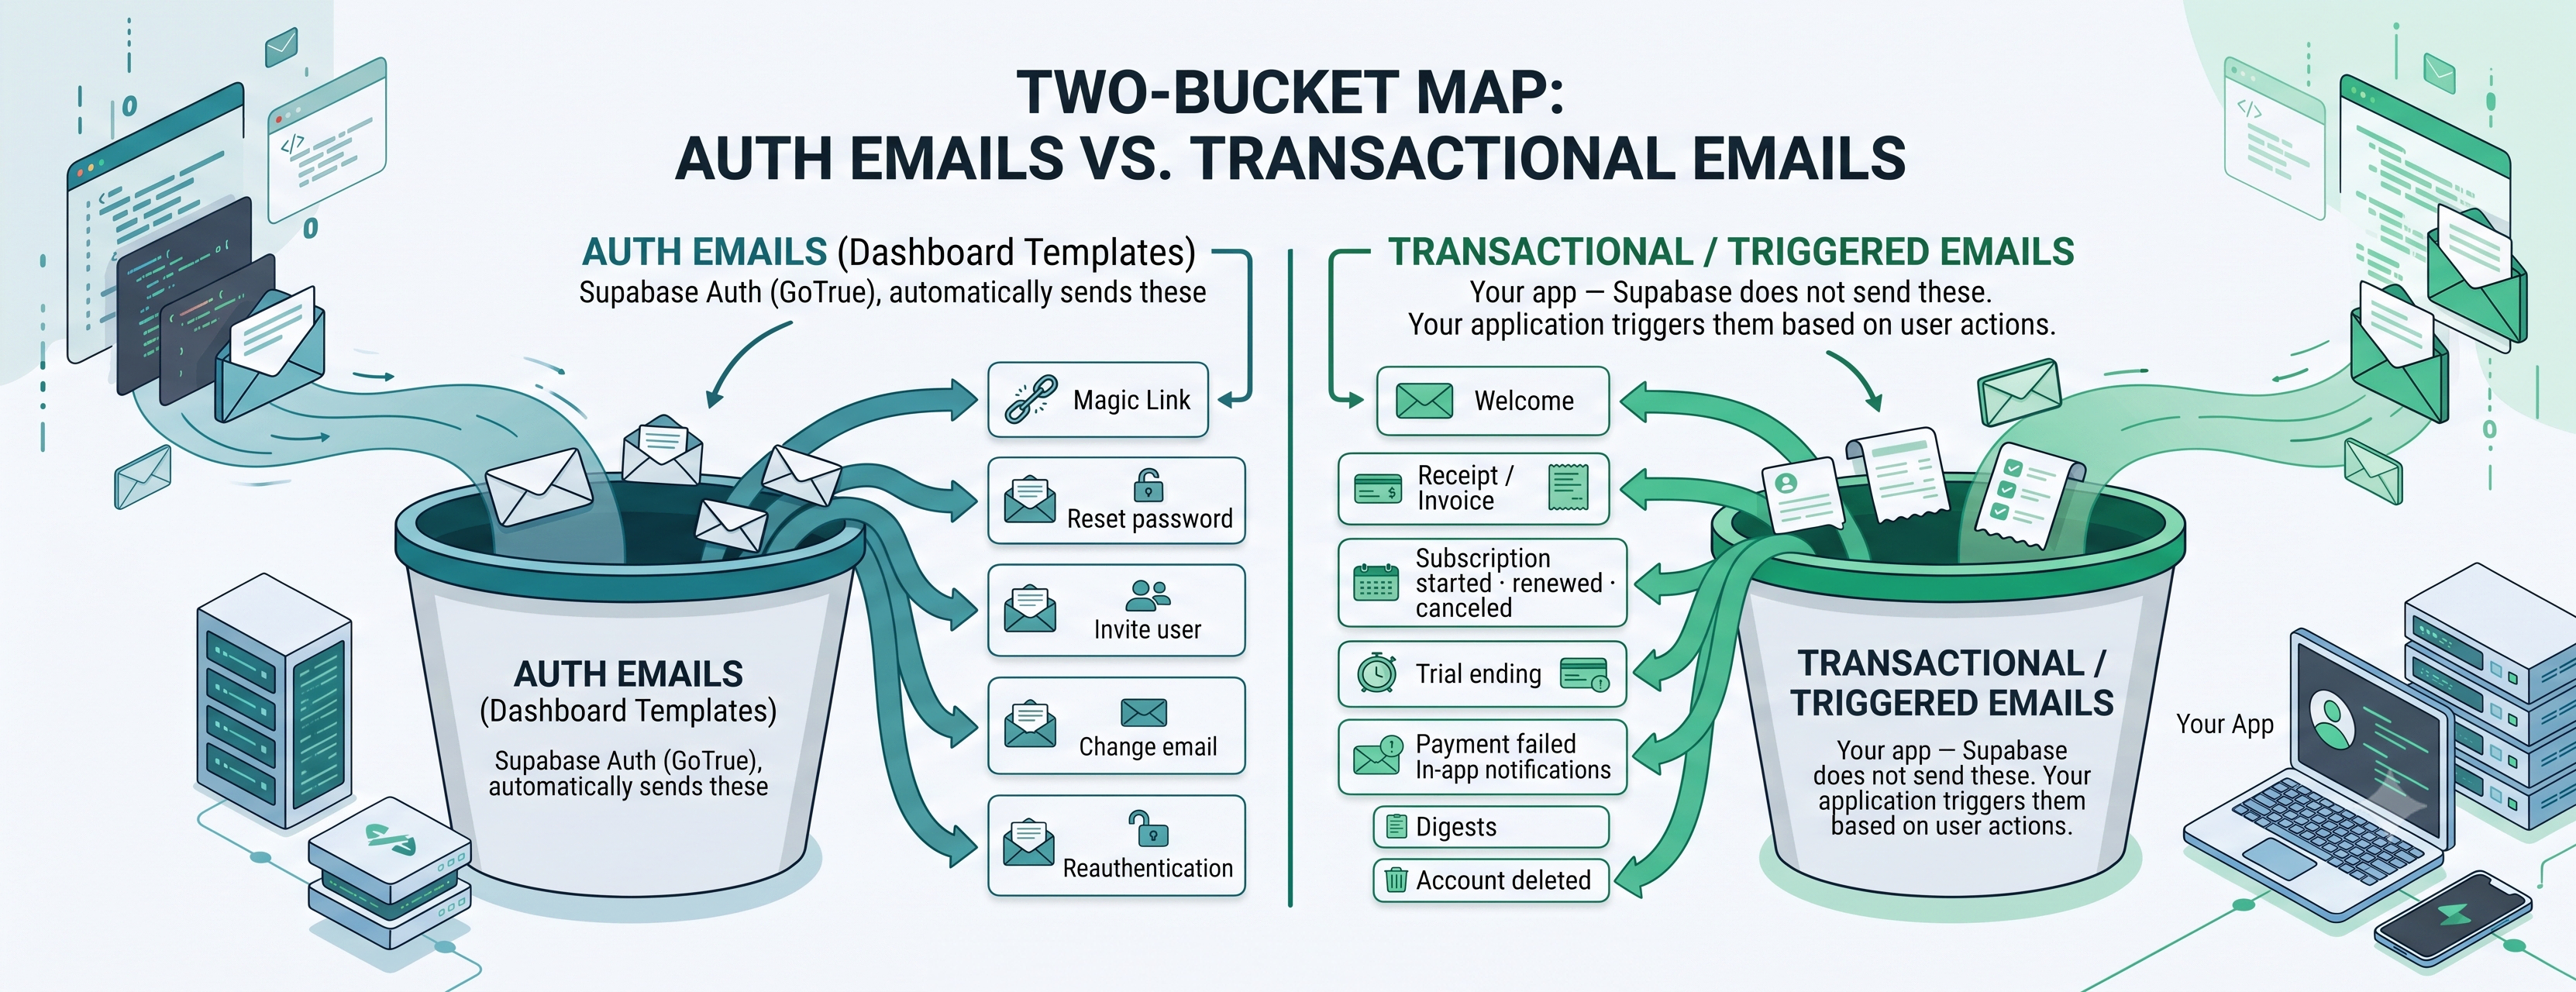
| Bucket | Who sends it | Examples |
|---|---|---|
| Auth emails (dashboard templates) | Supabase Auth (GoTrue), automatically | Confirm signup, Magic Link, Reset password, Invite user, Change email, Reauthentication |
| Transactional / triggered | Your app — Supabase does not send these | Welcome, receipt / invoice, subscription started · renewed · canceled, trial ending, payment failed, in-app notifications, digests, account deleted |
The distinction that matters: the first bucket is configured in Dashboard → Authentication → Emails (or in config.toml for local dev and version control). Supabase fires these for you when the matching auth event happens. This is the guide’s deep focus.
The second bucket Supabase will never send for you. A “welcome after signup” or a Stripe receipt is your responsibility to trigger — via the Send Email Hook, Edge Functions, database webhooks, or pg_cron. Covered in the transactional section.
How Supabase email templates work
The per-template sections stay short because everything they share lives here. Read this once.
Where you edit them
Two places, and you should know both:
- Dashboard → Authentication → Emails. Fastest for a quick change. The trade-off: edits live only in that project and aren’t in version control, so they drift — staging and production quietly diverge.
config.toml(local dev + CLI). Point each template at an HTML file and commit it. This is templates-as-code: reviewable, diffable, promotable across environments.
# supabase/config.toml
[auth.email.template.confirmation]
subject = "Confirm your email"
content_path = "./supabase/templates/confirmation.html"

[auth.email.template.recovery]
subject = "Reset your password"
content_path = "./supabase/templates/recovery.html"
If you edit only in the dashboard, plan for the drift. If you commit templates, plan to keep them in sync. Pick one, don’t work twice. See the Supabase docs on customizing email templates locally.
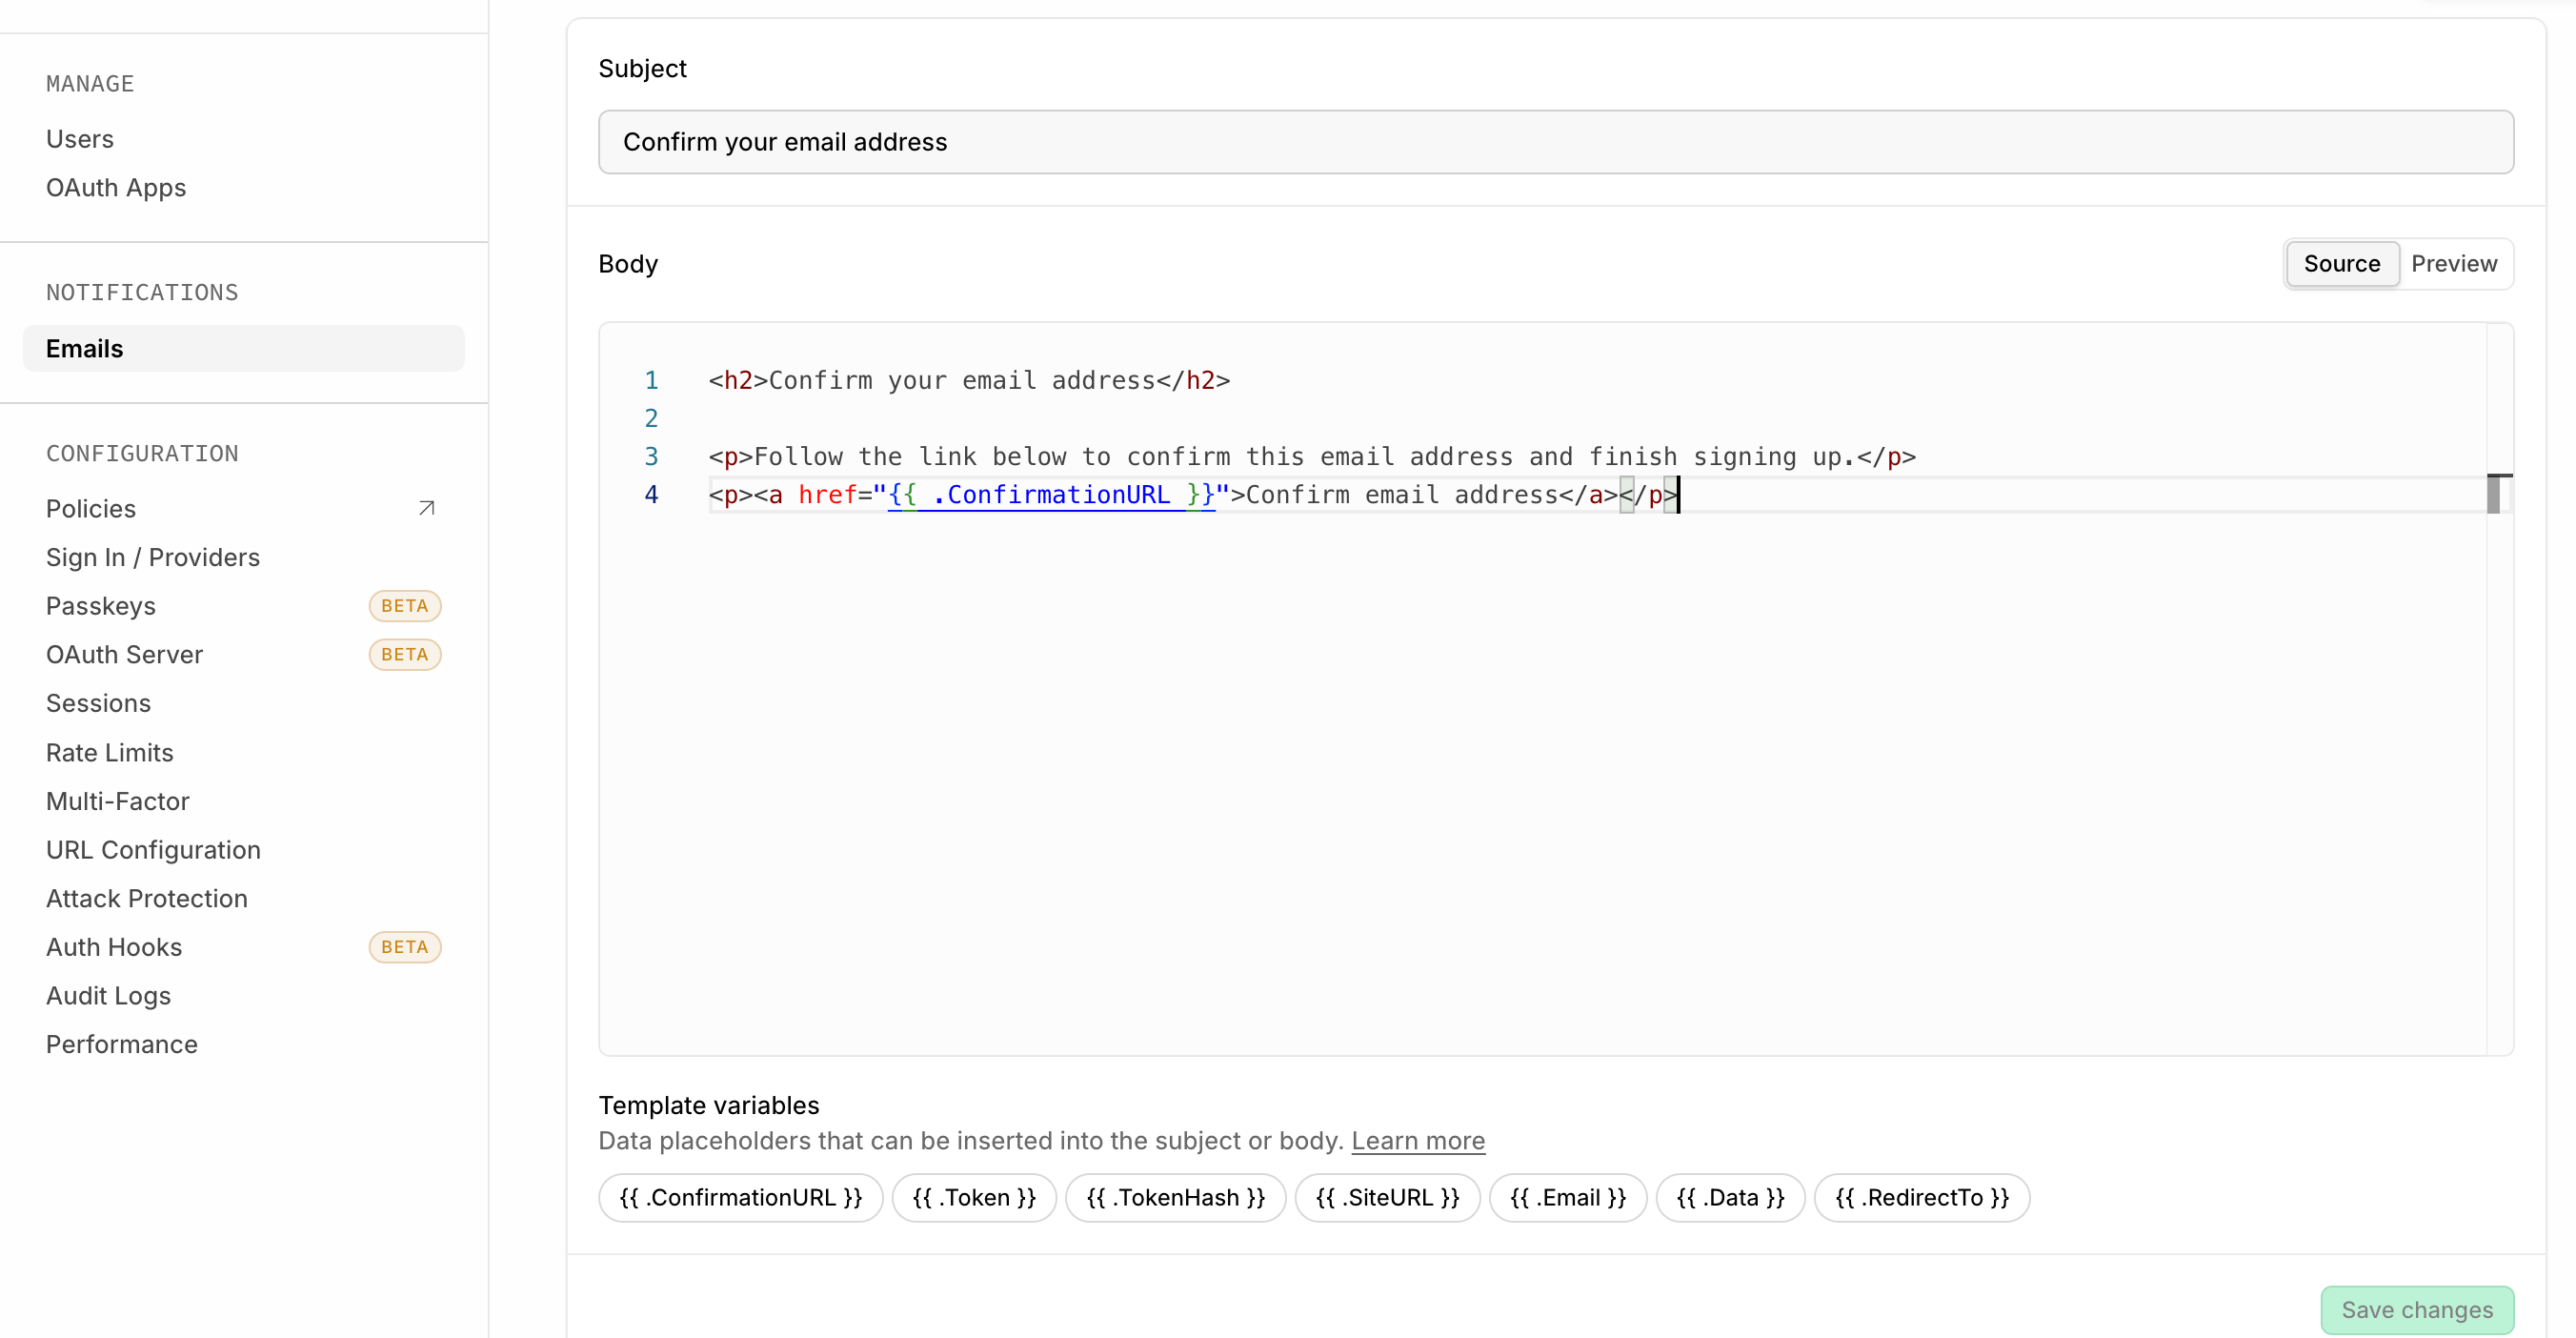
Template variables (reference)
Supabase exposes a small set of Go-template variables. Not every variable is available in every template — e.g. a reset email has a recovery URL, a reauthentication email has a code, not a link.
| Variable | What it is |
|---|---|
{{ .ConfirmationURL }} | The action link — confirm, recover, invite, change-email, depending on template |
{{ .Token }} | 6-digit OTP code (for code-based flows) |
{{ .TokenHash }} | Hashed token — use it to build your own verification URL when you want full control of the landing route |
{{ .SiteURL }} | Your configured site URL |
{{ .RedirectTo }} | Post-action redirect target |
{{ .Email }} / {{ .NewEmail }} | The user’s email address; {{ .NewEmail }} is the new address, available only in the change-email template |
{{ .Data }} | User metadata (a subset — don’t assume every field is present) |
Building your own verification route (the TokenHash pattern)
{{ .ConfirmationURL }} points at Supabase’s own verify endpoint, which then redirects to whatever Site URL / RedirectTo you’ve configured. That’s fine until you need the landing page itself to do something — set a new password, show an onboarding step, or just not 404 because the environment’s allow-list is out of sync. The fix in every “link 404s in production” and “user lands logged-in with nowhere to go” callout in this guide is the same: stop using {{ .ConfirmationURL }} and build the link yourself with {{ .TokenHash }}, pointed at a route in your own app.
{{ .ConfirmationURL }} (top) routes through an endpoint and redirect you don’t control and 404s when the allow-list drifts; a {{ .TokenHash }} link to your own /auth/confirm route (bottom) validates the token server-side and controls both the success and failure landings.In the template, swap the button’s href for a URL you construct — shown here for the Confirm signup template; the type value changes per template (list below):
<!-- Confirm signup template — use the matching type for other templates -->
<a href="{{ .SiteURL }}/auth/confirm?token_hash={{ .TokenHash }}&type=signup&next=/dashboard">
  Confirm email</a>
Then that route calls verifyOtp server-side and redirects into your app — it never 404s, because you own it. A Next.js Route Handler:
// app/auth/confirm/route.ts
import { type EmailOtpType } from '@supabase/supabase-js'
import { type NextRequest } from 'next/server'
import { redirect } from 'next/navigation'
import { createClient } from '@/utils/supabase/server'

export async function GET(request: NextRequest) {
  const { searchParams } = new URL(request.url)
  const token_hash = searchParams.get('token_hash')
  const type = searchParams.get('type') as EmailOtpType | null
  const next = searchParams.get('next') ?? '/'

  // missing params → straight to the error page, don't attempt verifyOtp
  if (token_hash && type) {
    const supabase = await createClient()
    const { error } = await supabase.auth.verifyOtp({ type, token_hash })
    if (!error) {
      redirect(next) // e.g. the password-reset form, or onboarding
    }
  }
  redirect('/auth/auth-code-error')
}
Same route handles every template — the type query param tells verifyOtp which flow it is, and it has to match the template you’re editing: type=signup for Confirm signup, type=magiclink for Magic Link, type=recovery for Reset password, type=invite for Invite user, and type=email_change for Change email address. You’ll also see type=email in some Supabase examples — it’s a documented catch-all that verifies signup, magic-link, recovery and invite token hashes, but it does not match change-email tokens, so the per-template values above are the safe habit. For reset password specifically, a successful verifyOtp here is what should land the user on a “set your new password” form, not a bare logged-in dashboard. The key win: 404s become a code path you control instead of a Supabase redirect you have to debug via the dashboard’s Site URL and redirect allow-list.
Go-templating limits (the honest version)
The templates run on Go’s text/template with a subset of functions. Practically:
- No arbitrary loops or complex branching — you can’t iterate a list of line items.
- Limited helper functions.
- It’s string interpolation with a few conditionals, not a rendering language.
This is fine for “insert a link into a layout.” It gets painful the moment you want a real branded layout, because the layout complexity has nowhere to go.
The inline-CSS / email-client reality
Even with perfect variables, email rendering is its own hostile environment:
- Outlook (Windows) uses Word’s rendering engine. Modern CSS silently fails; you need MSO conditional comments and table layouts for anything button-shaped.
<style>blocks are stripped or ignored in many clients — CSS has to be inline, on every element.- Dark mode repaints your backgrounds and can invert your logo unless you handle it explicitly.
- ~600px is the safe content width.
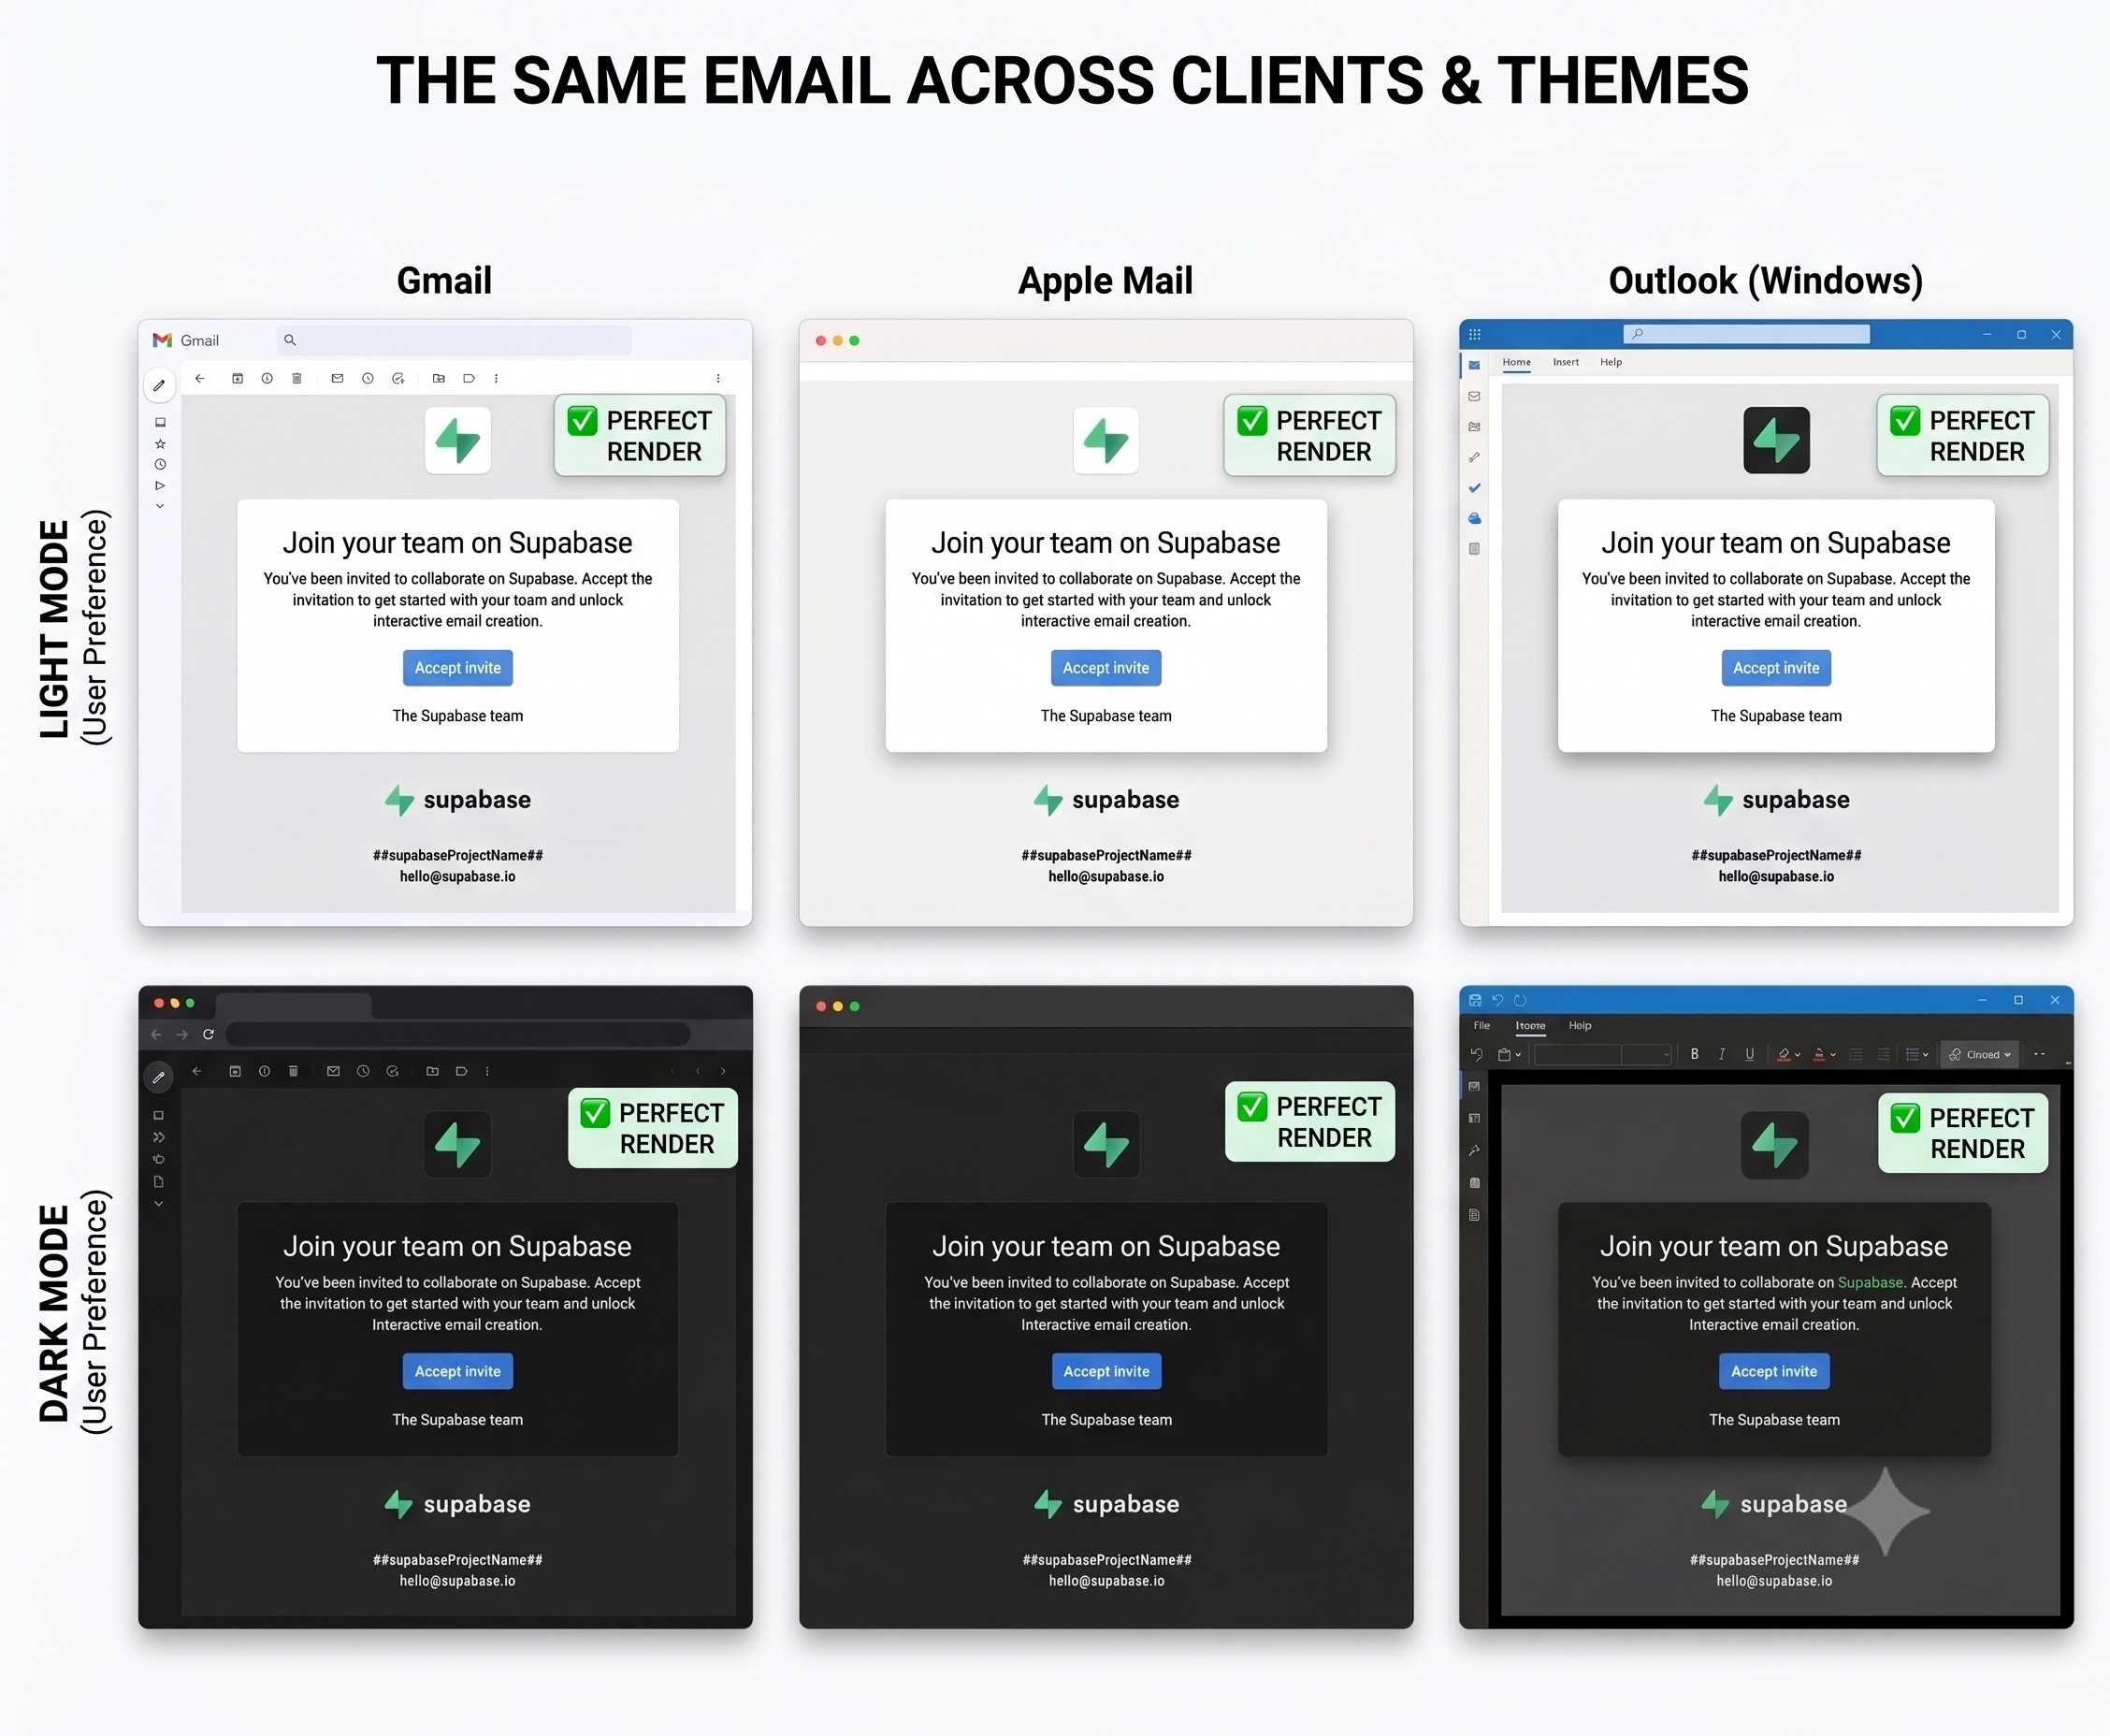
This is exactly the pain that makes hand-editing 6+ templates in a dashboard textarea a bad long-term plan. If you’d rather design them visually and keep the {{ variables }} intact, that’s what the tool does — but you can absolutely hand-roll them, and the next section shows you how.
Subject lines & preheader text
Every template below is shown as an HTML body, because that’s the part people copy-paste. But config.toml has a subject field for a reason: for an auth email, the subject line and preheader are most of whether it gets opened at all — and, for a confirmation or reset email, whether it’s trusted enough to click. Keep both short, specific, and free of anything that reads as clickbait (spam filters and users both penalize that on auth mail).
The preheader is the line clients show next to the subject in the inbox list. It isn’t a Supabase field — you write it as the first thing inside the body, hidden from the rendered email:
<div style="display:none;max-height:0;overflow:hidden;mso-hide:all;">
  Preheader text goes here — 40–100 characters, no HTML tags visible.
</div>
Recommended subject + preheader per template:
| Template | Subject | Preheader |
|---|---|---|
| Confirm signup | Confirm your email address | One click and you’re in — this link expires soon. |
| Magic Link | Your sign-in link | Tap to sign in, no password needed. Single use. |
| Reset password | Reset your password | Didn’t request this? You can safely ignore it. |
| Invite user | You’ve been invited | Accept your invite to set up your account. |
| Change email | Confirm your new email address | Confirming the change to {{ .NewEmail }}. |
| Reauthentication | Your verification code | Enter this code to confirm it’s you. |
| Security notifications | Your [password / email / phone] was changed | Wasn’t you? Secure your account now. |
Two things worth flagging: Supabase renders the subject field through the same templating engine, so you can drop {{ .Email }} or similar variables into it where they’re available on that template — a personalized subject reads less like a mass-sent auth email. And avoid noreply@ anywhere near the subject/preheader copy implying a reply is expected if your From address can’t actually receive one (more on the From address itself in Deliverability).
Logo and branded images
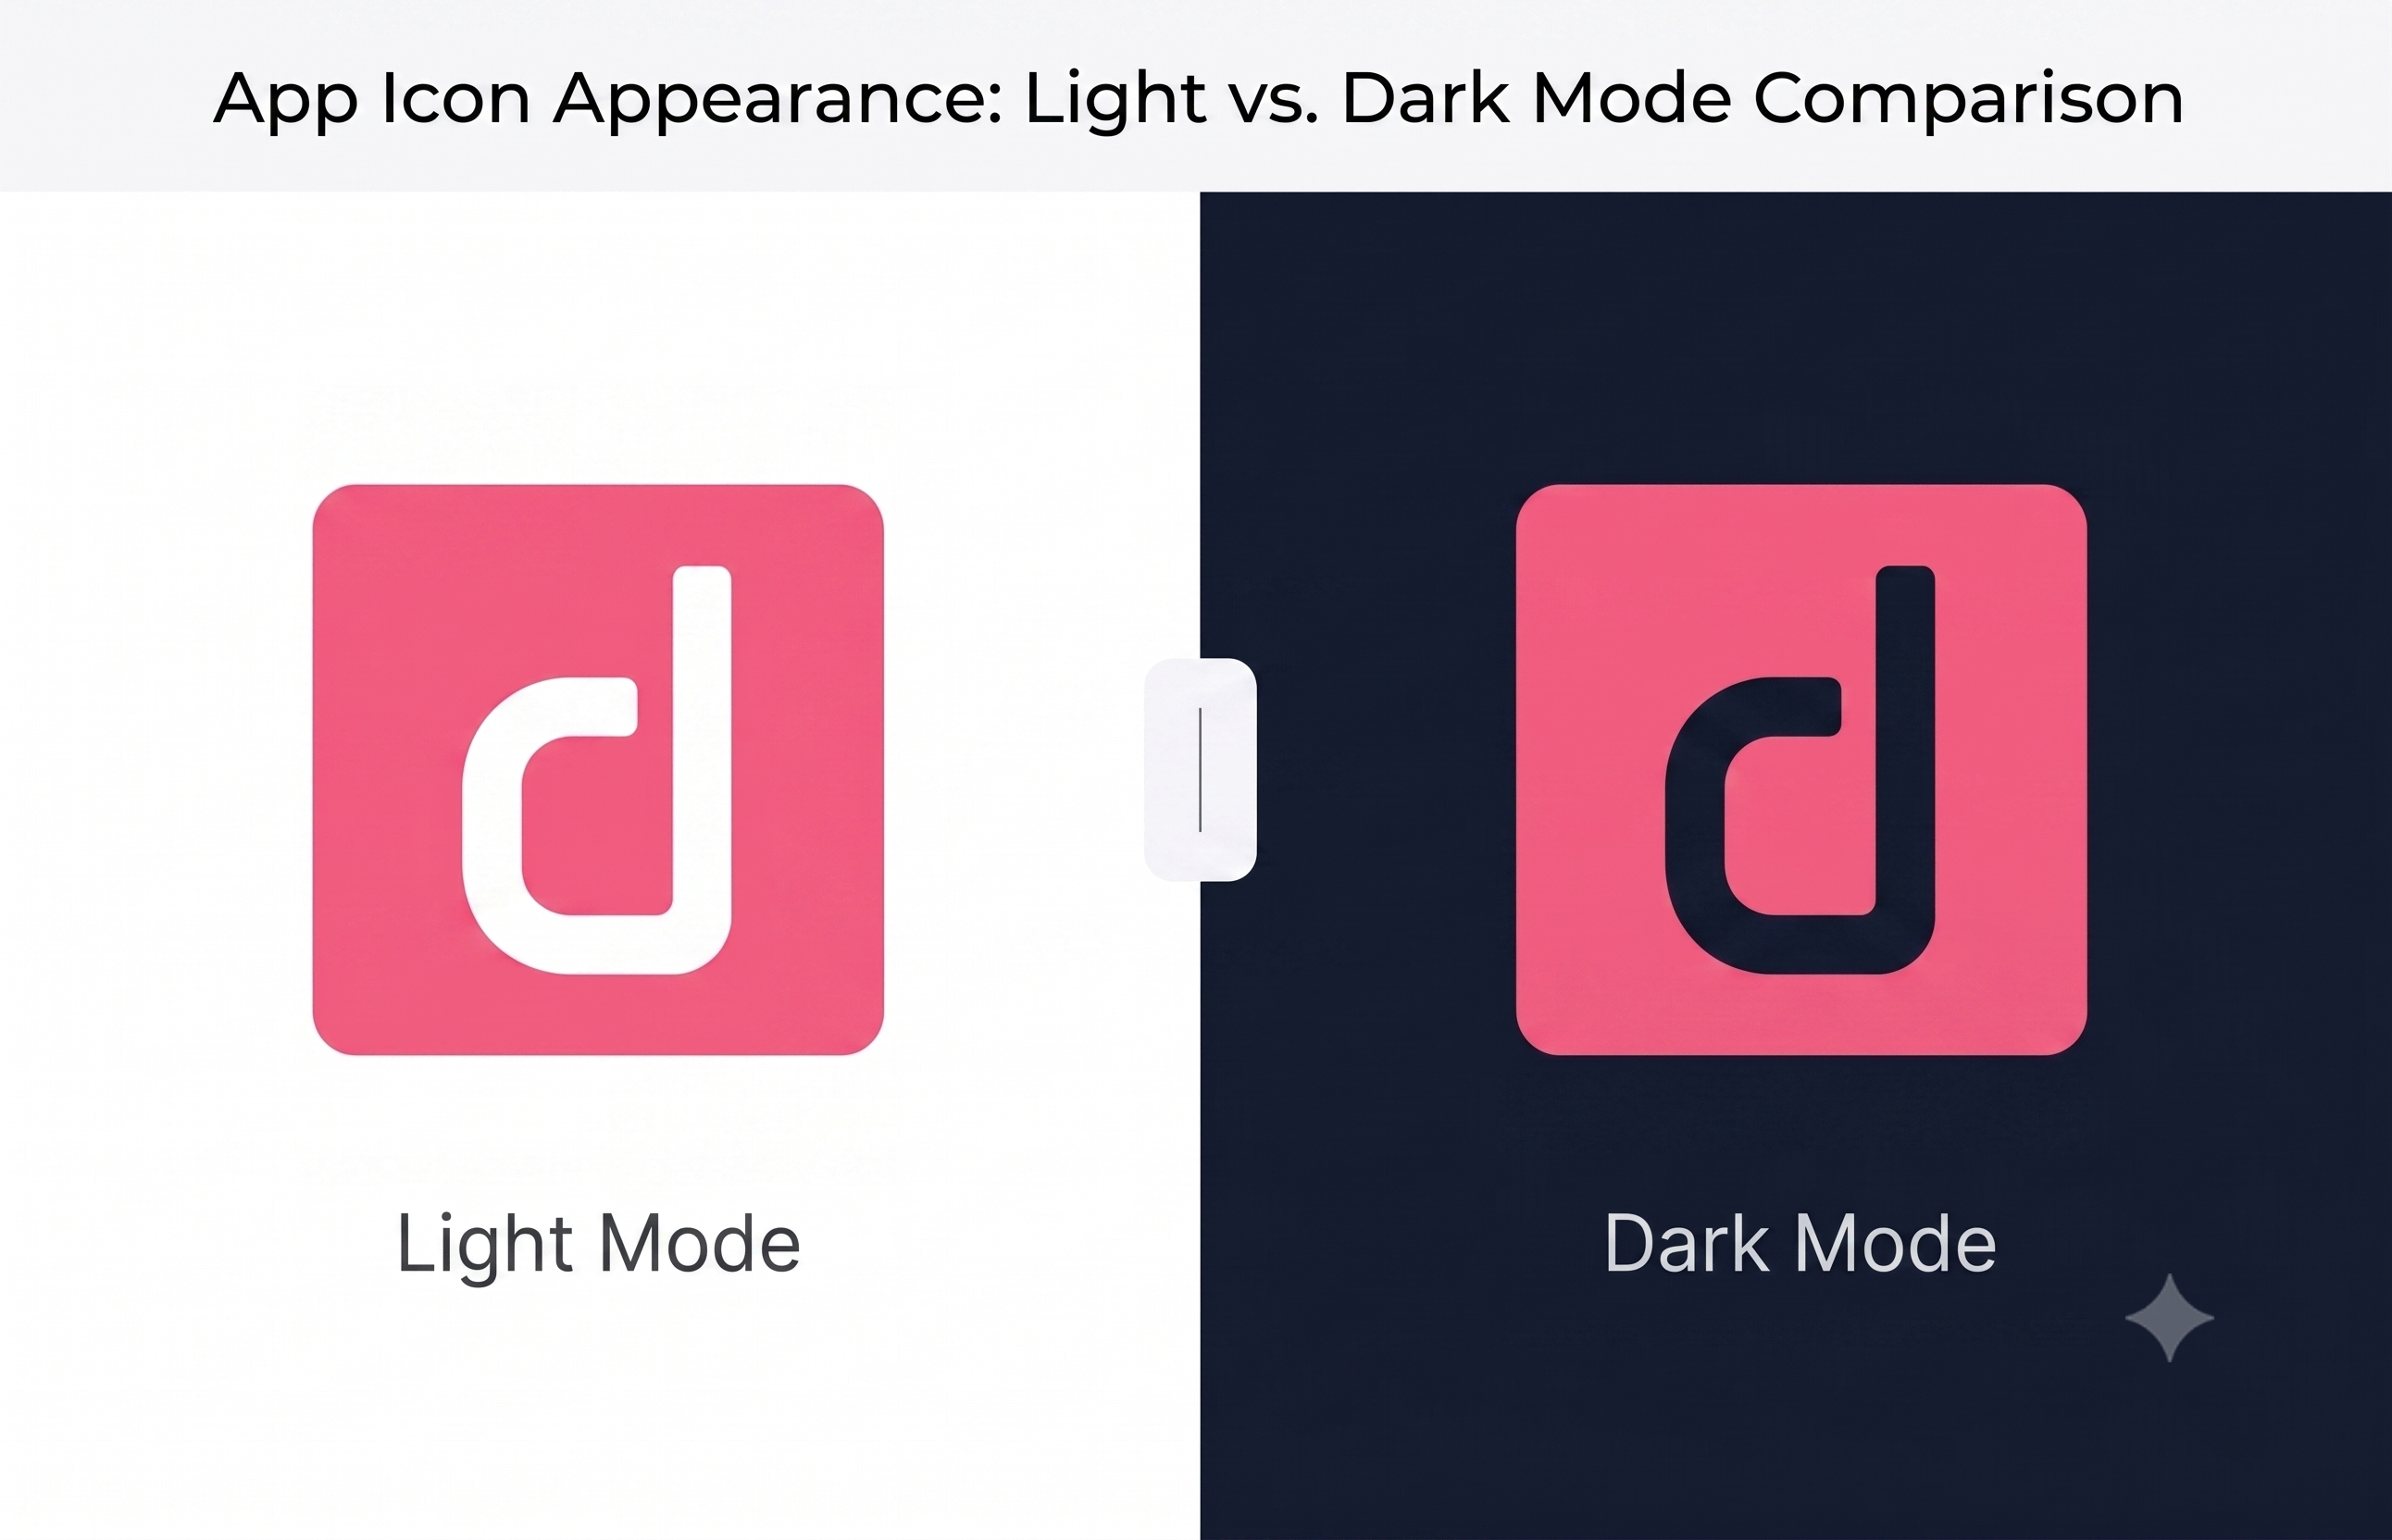
Every template in this guide is text and a button on purpose — that part travels safely across every email client with zero setup. But a “complete” branded template usually wants a logo, and logos are where email clients get hostile in new ways: relative paths break, images are blocked by default, and dark mode can invert a transparent PNG into something unreadable. Four rules cover it:
- Host it, absolutely. No relative paths — email clients have no concept of the page it “came from,” so the logo needs a real
https://URL, ideally on your main domain or its CDN. - Always set
alttext. Most clients block images until the user opts in, so for a few seconds (or forever, for some users) thealttext is your logo. - Constrain width with both the attribute and inline CSS. Some clients honor the HTML
widthattribute more reliably than a CSSmax-width— set both. - Handle dark mode explicitly, or the client either inverts a transparent PNG or leaves your logo unreadable against a dark background.
The built-in sender is test-only
Worth repeating because it bites people in their first week of real traffic: the default Supabase email service only delivers to pre-authorized addresses — members of your project’s team — and refuses everyone else with an “Email address not authorized” error. On top of that it’s rate-limited (currently 2 messages per hour, and Supabase says the number can change without notice) with no delivery SLA. Real users won’t get mail at all. Production needs custom SMTP — see Deliverability.
How email template deployment differs by environment
Everything above assumes you’ve already got HTML for a template — hand-written or exported from the tool. Getting that HTML actually live is where projects diverge, because Supabase auth email customization works differently depending on where the project runs. A hosted project only has the Dashboard. A self-hosted or local project also has config.toml, which points at HTML files instead. The three sections below cover each case — hosted, self-hosted, and local development via the CLI — so you know exactly where your exported HTML needs to go for your setup.
Hosted Supabase
On a hosted project (the default supabase.com-managed setup), there’s no config-file option for auth email templates — config.toml isn’t deployed anywhere for you to point at. Customization happens exclusively through the Dashboard, under Authentication → Email Templates.
The workflow is a straight paste-and-save:
- Generate the HTML for the template — with the tool, or by hand.
- Open Authentication → Email Templates in the Dashboard and select the matching template (Confirm signup, Magic Link, etc.).
- Paste the HTML into that template’s body field.
- Save.
Repeat per template, per project — and per environment if you run separate staging and production Supabase projects, since Dashboard edits live only in the project you’re editing. There’s no file to reference here, so no code snippet for this one.
Self-hosted Supabase
Self-hosted projects use the config.toml-based approach instead: each template is referenced via a content_path entry pointing at an external HTML file that you save yourself, rather than pasting HTML into a Dashboard field. The general pattern, one template at a time:
# supabase/config.toml
[auth.email.template.<type>]
subject = "<subject line>"
content_path = "./supabase/templates/<type>.html"
<type> corresponds to whichever of the 13 email types you’re configuring — confirmation, recovery, magic_link, invite, email_change, reauthentication, and so on for the rest of the set. The same three lines repeat for each one, with <type> and the file it points to swapped in; there’s no need to enumerate all 13 blocks here — save each exported HTML file at the content_path you declare, and Supabase reads it from disk at that path.
Local development (CLI)
Local dev uses the same mechanism as self-hosted — the identical config.toml syntax shown above, with content_path pointing at a file you save yourself. A few things are specific to running it locally rather than against a deployed self-hosted instance:
- Location. The
supabase/directory (holdingconfig.tomland the templates it references) sits at your project root — the same directory treesupabase initcreates andsupabase linkassociates with a remote project. - When the CLI picks it up.
supabase startreadsconfig.tomlwhen it spins up your local stack, andsupabase db resetre-reads it as part of resetting the local environment — so a template edit needs one of those (or an equivalent restart) before it shows up in the local inbox catcher, it isn’t picked up live. - Where to check it worked.
supabase startalso runs the local inbox catcher (Inbucket / Mailpit) mentioned earlier in this guide — use it to confirm the template you just pointedcontent_pathat is actually the one rendering, before you promote the same config to a self-hosted or hosted environment.
Same file, same content_path pattern as Self-hosted Supabase above — nothing further to add beyond how the CLI loads and reloads it.
Each auth email, one by one
Each template below opens with a one-line answer, then: what triggers it → which variables it gets → a production-ready template → the common problem. All templates share the shell below (inline CSS, ~600px, Outlook-safe, dark-mode aware); only the inner block changes, so they’re shown as drop-in content unless the whole file is instructive.
The shared shell — every template below drops into this:
<!-- Shared shell: paste your per-template block into <!-- BLOCK --> -->
<table role="presentation" width="100%" cellpadding="0" cellspacing="0" style="background:#f4f4f7;">
  <tr><td align="center" style="padding:32px 16px;">
    <table role="presentation" width="600" cellpadding="0" cellspacing="0"
      style="max-width:600px;background:#ffffff;border-radius:12px;
      font-family:Helvetica,Arial,sans-serif;">
      <tr><td style="padding:40px 40px 24px;">
        <!-- BLOCK -->
      </td></tr>
    </table>
  </td></tr>
</table>
Confirm signup
The #1 template people search for. Fires when a user signs up with email + password and email confirmation is on. Gets {{ .ConfirmationURL }} and {{ .Token }}.
Full, assembled — this is the exemplar; the other five follow the same pattern:
<!-- Confirm signup — inline CSS, ~600px, Outlook-safe, dark-mode aware -->
<table role="presentation" width="100%" cellpadding="0" cellspacing="0" style="background:#f4f4f7;">
  <tr><td align="center" style="padding:32px 16px;">
    <table role="presentation" width="600" cellpadding="0" cellspacing="0"
      style="max-width:600px;background:#ffffff;border-radius:12px;
      font-family:Helvetica,Arial,sans-serif;">
      <tr><td style="padding:40px 40px 24px;">
        <h1 style="margin:0 0 12px;font-size:22px;color:#1f2937;">Confirm your email</h1>
        <p style="margin:0 0 24px;font-size:15px;line-height:24px;color:#4b5563;">
          Tap the button below to confirm your account.</p>
        <!--[if mso]><table role="presentation"><tr><td><![endif]-->
        <a href="{{ .ConfirmationURL }}"
          style="display:inline-block;padding:12px 28px;border-radius:8px;
          background:#10b981;color:#ffffff;font-size:15px;
          font-weight:bold;text-decoration:none;">Confirm email</a>
        <!--[if mso]></td></tr></table><![endif]-->
        <p style="margin:24px 0 0;font-size:13px;color:#9ca3af;">
          Or use this code: {{ .Token }}</p>
      </td></tr>
    </table>
  </td></tr>
</table>
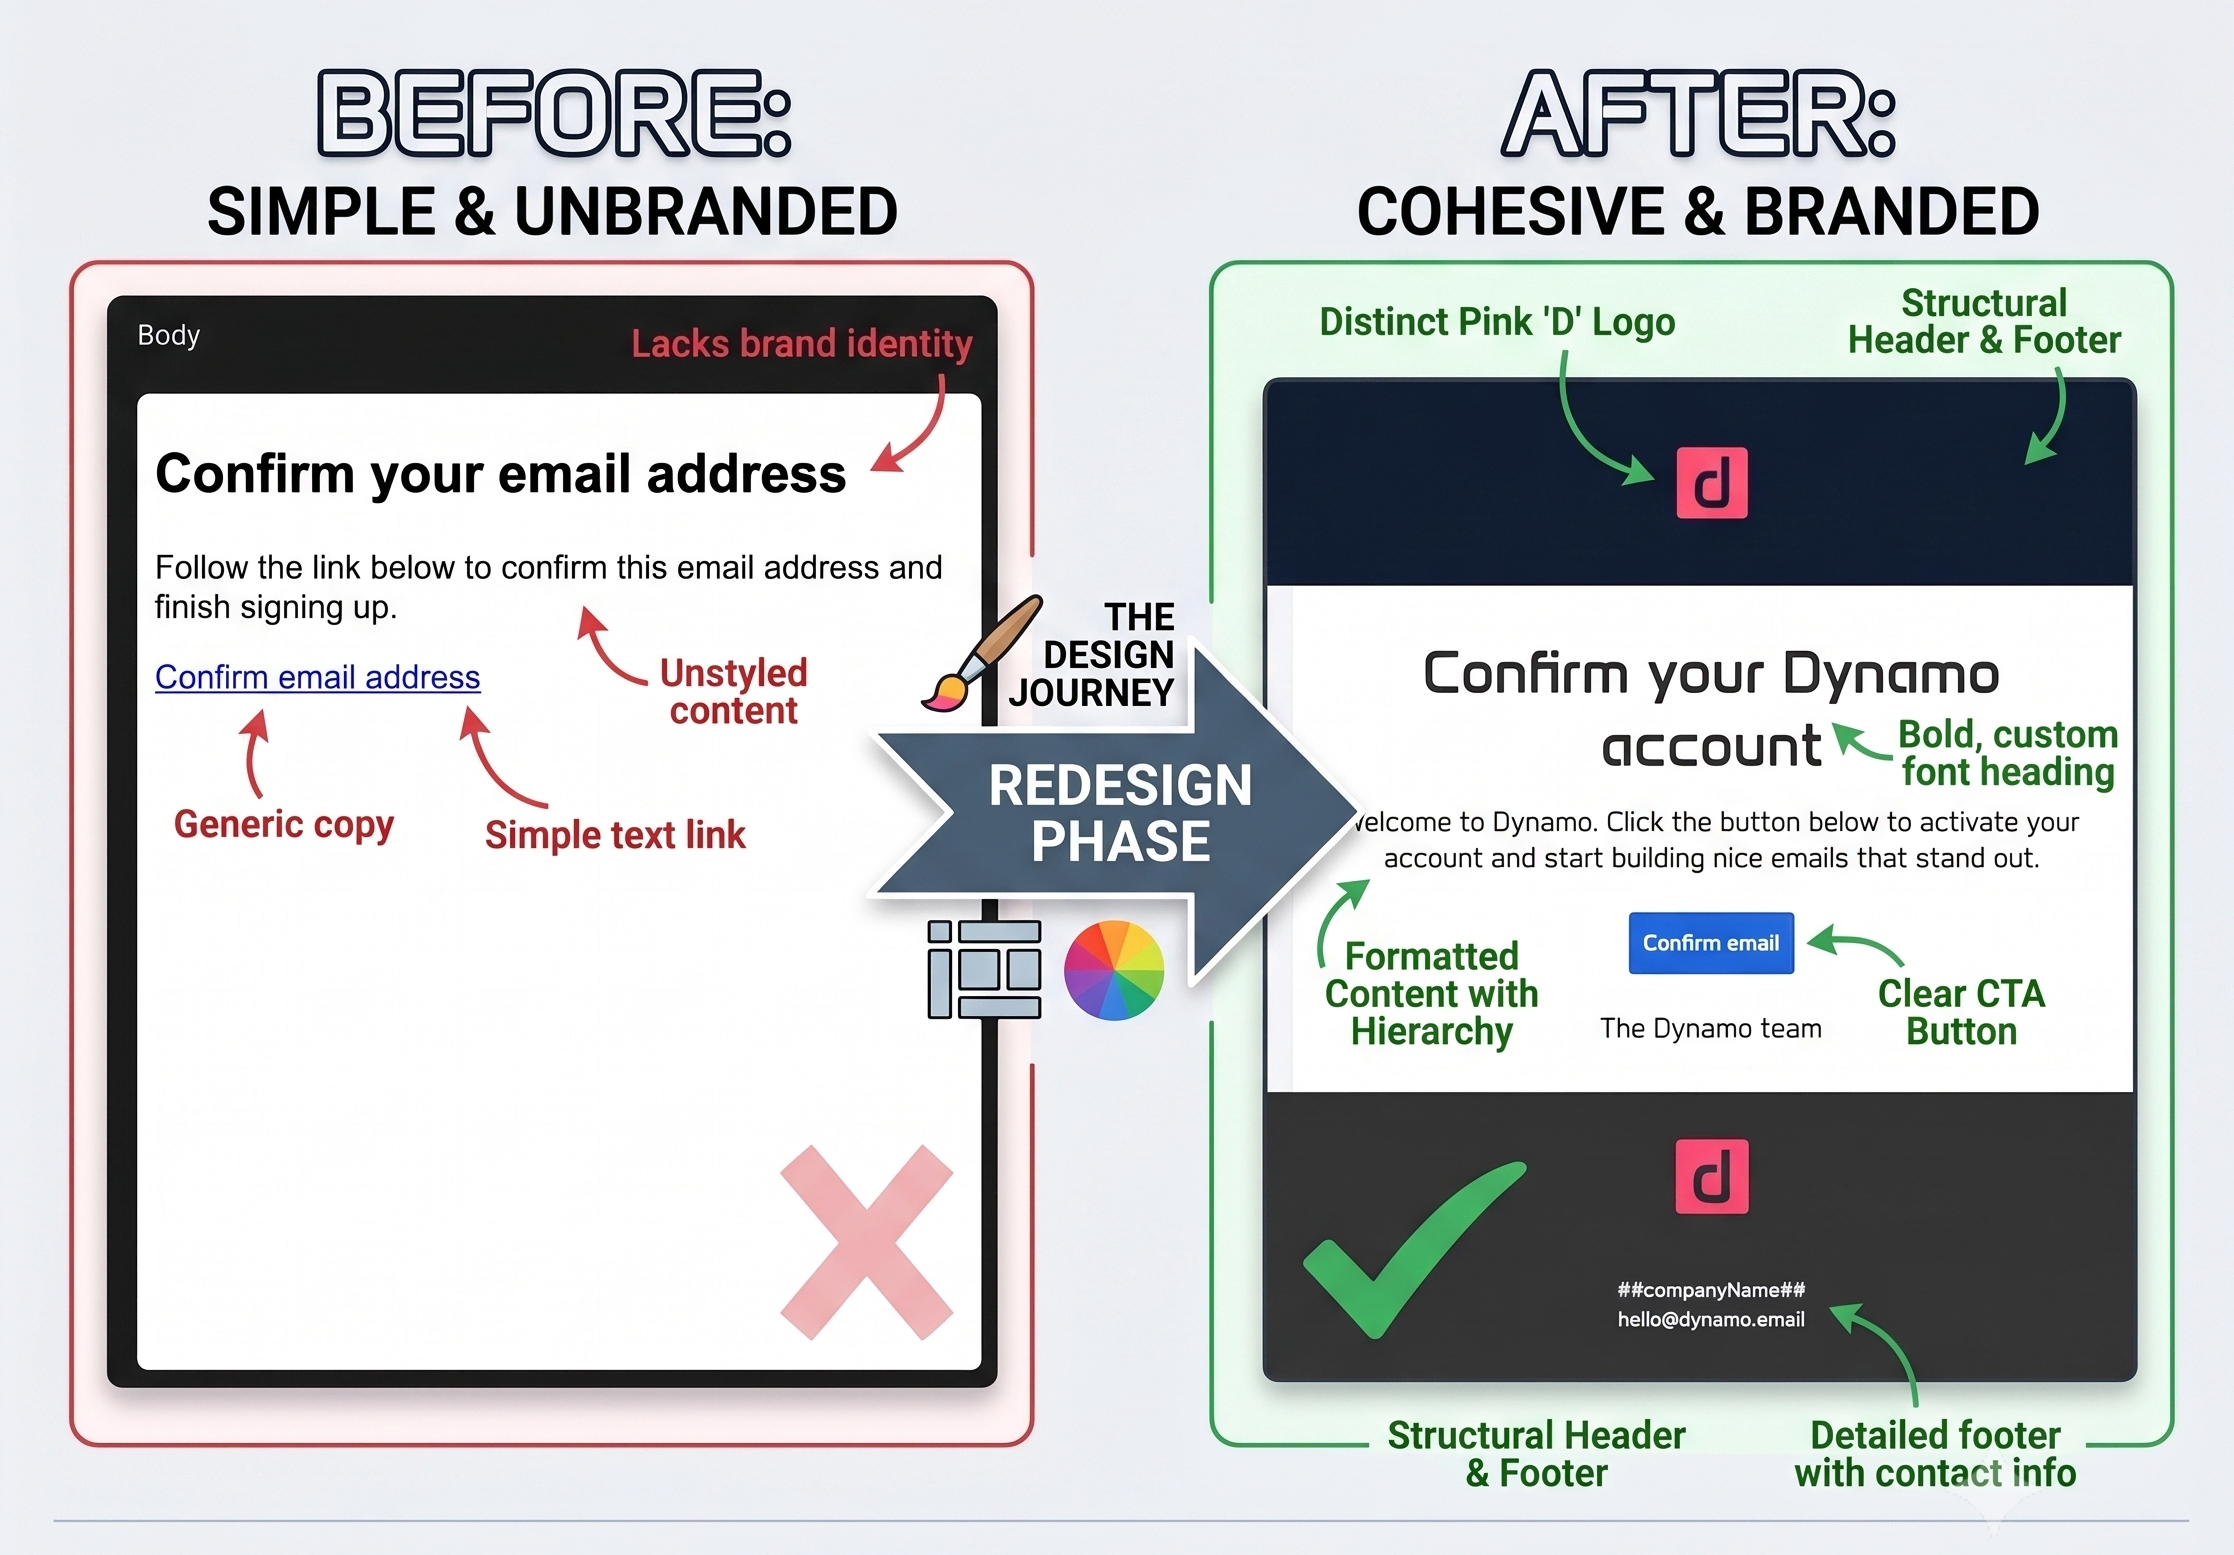
Common problem: the link works locally but 404s in production. Almost always a Site URL / redirect-allow-list mismatch under Auth settings — the confirmation URL is built from your configured Site URL. Set it correctly per environment, or sidestep it entirely by building your own verify route with {{ .TokenHash }}.
Magic Link
Passwordless sign-in link. Fires on a magic-link sign-in request. Gets {{ .ConfirmationURL }}; can also expose {{ .Token }} if you offer a code variant.
Drop-in block:
<h1 style="margin:0 0 12px;font-size:22px;color:#1f2937;">Your sign-in link</h1>
<p style="margin:0 0 24px;font-size:15px;line-height:24px;color:#4b5563;">
  Click below to sign in. This link expires shortly and can be used once.</p>
<!--[if mso]><table role="presentation"><tr><td><![endif]-->
<a href="{{ .ConfirmationURL }}"
  style="display:inline-block;padding:12px 28px;border-radius:8px;
  background:#10b981;color:#ffffff;font-size:15px;font-weight:bold;text-decoration:none;">
  Sign in</a>
<!--[if mso]></td></tr></table><![endif]-->
<p style="margin:24px 0 0;font-size:13px;color:#9ca3af;">
  Prefer a code? Use: {{ .Token }}</p>
Common problem: users click the link twice (once in preview scanners, once for real) and the second click fails because the token is single-use. Set clear expectations in copy, and note that corporate link-scanners can consume the link before the user does — a code fallback ({{ .Token }}) sidesteps it.
Reset password (recovery)
High-intent — the user is locked out and impatient. Fires on a password-recovery request. Gets {{ .ConfirmationURL }} (the recovery link) and {{ .RedirectTo }}.
Drop-in block:
<h1 style="margin:0 0 12px;font-size:22px;color:#1f2937;">Reset your password</h1>
<p style="margin:0 0 24px;font-size:15px;line-height:24px;color:#4b5563;">
  We got a request to reset your password. If it wasn't you, ignore this email.</p>
<!--[if mso]><table role="presentation"><tr><td><![endif]-->
<a href="{{ .ConfirmationURL }}"
  style="display:inline-block;padding:12px 28px;border-radius:8px;
  background:#10b981;color:#ffffff;font-size:15px;font-weight:bold;text-decoration:none;">
  Reset password</a>
<!--[if mso]></td></tr></table><![endif]-->
Common problem — the token/redirect gotcha: the recovery link lands the user in a session state your app has to handle. If your reset page doesn’t read the recovery event and let the user set a new password, they land “logged in” with nowhere to go. Wire the redirect target ({{ .RedirectTo }} / Site URL) to a page that actually handles the recovery flow — see building your own verify route for the exact handler that calls verifyOtp and lands the user on a “set new password” form instead of a bare dashboard.
Invite user
Team / app invitations sent from inviteUserByEmail. Gets {{ .ConfirmationURL }}.
Drop-in block:
<h1 style="margin:0 0 12px;font-size:22px;color:#1f2937;">You've been invited</h1>
<p style="margin:0 0 24px;font-size:15px;line-height:24px;color:#4b5563;">
  Accept the invitation to set up your account.</p>
<!--[if mso]><table role="presentation"><tr><td><![endif]-->
<a href="{{ .ConfirmationURL }}"
  style="display:inline-block;padding:12px 28px;border-radius:8px;
  background:#10b981;color:#ffffff;font-size:15px;font-weight:bold;text-decoration:none;">
  Accept invite</a>
<!--[if mso]></td></tr></table><![endif]-->
Common problem: invited users hit a confirmation link but land on a generic login with no context. Add the inviting org / app name via metadata where available, and route the redirect to an onboarding page rather than a bare login.
Change email address
A double-confirmation flow — by default Supabase confirms on both the old and new address. This template can render for each side, so it needs to speak to both. Gets {{ .Email }} and {{ .NewEmail }} plus {{ .ConfirmationURL }}.
Drop-in block:
<h1 style="margin:0 0 12px;font-size:22px;color:#1f2937;">Confirm your new email</h1>
<p style="margin:0 0 24px;font-size:15px;line-height:24px;color:#4b5563;">
  Confirm changing your address from {{ .Email }} to {{ .NewEmail }}.</p>
<!--[if mso]><table role="presentation"><tr><td><![endif]-->
<a href="{{ .ConfirmationURL }}"
  style="display:inline-block;padding:12px 28px;border-radius:8px;
  background:#10b981;color:#ffffff;font-size:15px;font-weight:bold;text-decoration:none;">
  Confirm change</a>
<!--[if mso]></td></tr></table><![endif]-->
Common problem: people forget the old address also gets a mail and get confused by two near-identical emails. Make the copy explicit about which address is which ({{ .Email }} vs {{ .NewEmail }}), and note whether “secure email change” (both-sides confirmation) is enabled in your project, since it changes how many emails fire.
Reauthentication (OTP)
A 6-digit code for sensitive actions (e.g. confirming before a destructive change). Gets {{ .Token }} — a code, not a link. Don’t put a button here.
Drop-in block:
<h1 style="margin:0 0 12px;font-size:22px;color:#1f2937;">Confirm it's you</h1>
<p style="margin:0 0 16px;font-size:15px;line-height:24px;color:#4b5563;">
  Enter this code to continue:</p>
<p style="margin:0;font-size:32px;letter-spacing:6px;font-weight:bold;color:#1f2937;">
  {{ .Token }}</p>
<p style="margin:16px 0 0;font-size:13px;color:#9ca3af;">
  This code expires shortly. If you didn't request it, ignore this email.</p>
Common problem: copying the link pattern from other templates and looking for a {{ .ConfirmationURL }} that isn’t there. Reauthentication is code-only. Design for a readable, copyable, large, spaced code.
The Security notification set
Beyond the six action emails above, the dashboard exposes a Security category — notification emails that fire after a security-relevant change to fill out the complete map.
These are different. The auth emails carry a link or code to complete something. Security emails complete nothing — they inform. There’s no {{ .ConfirmationURL }} and no {{ .Token }}; the whole job is “this happened to your account, and if it wasn’t you, act now.” So they need a different shape: no primary CTA button, and a “wasn’t you?” tripwire pointing at your own account-security page (a static URL in your app, not a Supabase variable).
They’re also opt-in — each is toggled on per template rather than enabled by default like most of the auth set. Turn on the ones that match a real account action in your app; a “Phone changed” alert only makes sense if you actually support phone numbers.
| Template | Fires when |
|---|---|
| Password changed | A password change completes |
| Email changed | An email change completes (the after-the-fact notice — distinct from the Change email confirmation flow above) |
| Phone changed | A phone number change completes |
| Identity linked | A new auth identity (e.g. a Google / GitHub OAuth provider) is linked to the account |
| Identity unlinked | A linked identity is removed |
| MFA method added | A user enrolls a new MFA factor |
| MFA method removed | An MFA factor is removed |
Because they share the notification pattern, they share one block — swap the sentence, keep the tripwire:
<h1 style="margin:0 0 12px;font-size:22px;color:#1f2937;">Security update</h1>
<p style="margin:0 0 20px;font-size:15px;line-height:24px;color:#4b5563;">
  Your password was changed. <!-- swap per template -->
  If you made this change, no action is needed.</p>
<p style="margin:0;font-size:14px;line-height:22px;color:#4b5563;">
  Didn't do this? <a href="https://YOUR-APP/account/security"
  style="color:#10b981;text-decoration:underline;">Secure your account</a> right away.</p>
Common problem: treating these like the action emails and hunting for a confirmation link that isn’t there — or worse, adding a big green “Confirm” button to a notice about something that already happened, which trains users to click buttons in security alerts (exactly backwards). Keep them plain, keep the recovery link honest, and point it at a page you control.
Transactional & triggered emails beyond auth
Everything above, Supabase sends automatically. Everything below, you send. There’s no “welcome email” toggle. A welcome, a receipt, a “your trial ends in 3 days” all have to be triggered by your app.
The Send Email Hook, gateway to your users
The Send Email Hook lets you override Supabase’s default sending entirely. Instead of Supabase mailing the template, it calls your function with the email payload, and you send it yourself. That unlocks:
- Your own provider for auth emails too (Resend, SendGrid, Postmark, Amazon SES, Bluefox.email, etc.) — one sending domain and reputation across everything.
- React Email / MJML rendering instead of the Go-template subset — real components, real loops.
- Localisation — pick the language per user at send time.
This is the single most useful lever if you’ve outgrown the dashboard templates.
Triggering your app’s emails
The common pattern for app-generated mail:
DB event (insert/update)
   → Database Webhook / trigger
      → Edge Function
         → ESP (Resend / SendGrid / Postmark / SES)
For scheduled sends (digests, “trial ending”), use pg_cron to run on a schedule and pg_net to call the Edge Function or ESP from Postgres.
The lifecycle set to plan for
Most apps end up sending some subset of: welcome, receipt / invoice, subscription started · renewed · canceled, trial ending, payment failed, notifications, digests, account deleted. Plan the whole set early — they share a design system with your auth emails, and keeping them consistent by hand is the maintenance tax.
Deliverability: making them actually arrive
A perfectly designed email that lands in spam is worse than a plain one that lands in the inbox.
Custom SMTP (do this before you have real users)
Swap the test-only built-in sender for a real provider. The three records that decide whether you reach the inbox:
- SPF — authorises your sending host.
- DKIM — cryptographically signs your mail; the biggest single lever on inbox placement.
- DMARC — tells receivers what to do with mail that fails the above, and gives you reporting.
Set all three on your sending domain. See the Supabase custom SMTP docs.
Rate limits & “not sending”
The two highest-intent failures devs land here for:
- “Not sending at all.” First check: are you still on the built-in sender? It only delivers to addresses on your project’s team — everyone else fails with “Email address not authorized” — and it’s capped at ~2 messages/hour. Both are the most common causes in early projects. Move to custom SMTP.
- Sending but landing in spam. Almost always missing/incorrect DKIM/DMARC, or a brand-new sending domain with no reputation. Warm up and authenticate.
Send a plain-text alternative, not just HTML
SPF, DKIM, and DMARC get all the attention because they’re DNS and feel like “real” setup — but an HTML-only email is itself a spam signal. Every legitimate template above should ship as multipart/alternative: an HTML part and a plain-text part in the same message. Most ESPs (Resend, Postmark, SendGrid, SES) auto-generate the text part from your HTML when you send through their API, but if you’re going through the Send Email Hook and building the raw message yourself, you have to supply both. A plain-text version of the confirm-signup template:
Confirm your email

Tap the link below to confirm your account:
{{ .ConfirmationURL }}

Or use this code: {{ .Token }}

If you didn't request this, ignore this email.
Keep it as a direct, unstyled transcript of the HTML — same links, same code, same core message, no markdown syntax that won’t render as intended.
From name, address, and reply-to
Two fields most people leave on their SMTP provider’s default, and both quietly cost trust and deliverability:
- From name. Use your actual product or company name — “Acme” or “Acme Support,” not the raw sending domain. It’s the first thing a user scans in their inbox list, before the subject line even registers.
noreply@is discouraged. It signals “we don’t want to hear from you,” some spam filters weight it negatively, and it forecloses the one thing users actually do — reply asking “I didn’t request this, what’s going on?” Use a real, monitored address (hello@,support@) as the From or at minimum set a monitored Reply-To, even if auth mail is sent from a dedicated subdomain likeauth@mail.yourapp.com.
Bounce and complaint monitoring
DNS and copy get you delivered once. Sender reputation is what keeps you delivered — and reputation is built from what happens after you send: hard bounces (invalid address) and spam complaints both need to feed back into suppression, or your next campaign inherits the damage. Supabase itself doesn’t do this for you; it’s a property of your SMTP provider:
- Turn on bounce and complaint webhooks in your ESP (Resend, Postmark, SES, SendGrid all support them).
- Maintain a suppression list and check it (or let your ESP check it) before sending — never retry a hard bounce.
- Watch your complaint rate specifically; most providers will warn or throttle you well before it becomes a deliverability crisis, but only if someone’s actually looking at the dashboard.
Test rendering and spam score before you ship
supabase start gives you a local inbox catcher (Inbucket / Mailpit) that tells you the HTML renders — it doesn’t tell you it’ll land, or that Outlook won’t mangle it. Before shipping a template change, run it through something that checks the parts a local catcher can’t:
- mail-tester.com — send it a test message, get a spam score and a breakdown of what's dragging it down (SPF/DKIM/DMARC status, content flags, blacklist hits).
- Litmus or Email on Acid — real screenshots across actual Outlook, Gmail, and Apple Mail (including dark mode), so you catch the Outlook-table-layout break or the inverted logo before a user does.
Re-run both after any non-trivial template edit, not just once at launch — clients update their rendering engines, and DNS records can silently lapse.
Maintaining Supabase emails as your app grows
This is the part no other guide covers, and it’s the part that actually costs you time. One email is a five-minute edit. Thirteen-plus emails that all have to stay on-brand, tested, versioned, and localisable is a standing tax.
- Consistent branding across every email. One design system — shared header, colours, button, footer — not a dozen divergent HTML blobs that drift every time someone edits one in a hurry.
- Versioning. If templates live only in the dashboard, staging and production quietly diverge.
config.tomlin git makes templates reviewable and promotable. Templates-as-code beats dashboard drift. - Testing and re-testing. Clients change, dark mode changes, and Supabase occasionally changes its defaults — which can silently reset or alter a template you forgot you were relying on. Re-test on a cadence, not just once.
- Localisation. Multi-language is only practical through the Send Email Hook, where you can branch on user language at send time.
None of this is hard once. It’s the repeat that hurts — every new email, every rebrand, every client-rendering regression, times thirteen. If that repeat is starting to cost you real time, Emails for Supabase generates and maintains the whole branded set for you.
The fast path: design & maintain them visually
You can hand-edit inline HTML in the dashboard — this guide showed you exactly how, and for one or two templates that’s completely reasonable. The alternative, when you’re maintaining the whole set, is to design them visually, keep the {{ variables }} intact, and export ready-to-paste HTML.
That’s what the tool does. Paste your site’s URL, it reads your brand, and it hands back the full set of Supabase auth emails with the merge tags already wired in — sign in with GitHub or Google to export.
- Brand the full set of Supabase auth emails
- Paste your URL and go — sign in with GitHub or Google to export
- Live preview, per-field editing, HTML / ZIP export
Free while Emails for Supabase is in early access.
- $18 / brand for the whole set, editable and re-downloadable
- Covers the lifecycle emails from the transactional set too
- For product teams: the Chamaileon SDK to embed email building in your own product
Pricing not live yet — everything is free during early access.
If hand-editing HTML works for you, keep doing it — the templates above are yours to copy. The tool is for when the maintenance tax starts costing more than the emails are worth.
FAQ
How do I customize Supabase auth emails?
Edit them in Dashboard → Authentication → Emails, or point config.toml at HTML files for version control. Keep the {{ variables }} intact, inline all CSS, and test in real clients before shipping. See How Supabase email templates work.
What variables can I use in Supabase email templates?
The core set is {{ .ConfirmationURL }}, {{ .Token }}, {{ .TokenHash }}, {{ .SiteURL }}, {{ .RedirectTo }}, {{ .Email }} / {{ .NewEmail }}, and {{ .Data }} — but availability differs per template. Full table in the foundation section.
Why is my Supabase email not sending?
Most often you’re still on the test-only built-in sender, which only delivers to your project team’s addresses and is capped at about 2 messages/hour. Move to custom SMTP. See Deliverability.
Is the built-in Supabase email sender OK for production?
No — it’s rate-limited and meant for testing. Configure custom SMTP with SPF, DKIM, and DMARC before you have real users.
Why does my Supabase confirmation link 404 in production?
Usually a Site URL / redirect-allow-list mismatch. The reliable fix is to stop relying on {{ .ConfirmationURL }} and build your own link with {{ .TokenHash }}, pointed at a route in your app that calls verifyOtp({ token_hash, type }) server-side. See building your own verification route.
Should Supabase auth emails include a plain-text version?
Yes — HTML-only mail is itself a spam signal. Send multipart/alternative with both an HTML and a plain-text part. Most ESPs generate the text part automatically when you send through their API; if you’re building the message yourself via the Send Email Hook, you need to supply both. See Deliverability.
Can I use React Email or MJML with Supabase?
Yes, via the Send Email Hook — you render the email yourself and return the HTML, bypassing the Go-template limits. See Transactional & triggered emails.
How do I send a welcome email after signup?
Supabase won’t send it for you. Trigger it from a database webhook → Edge Function → your ESP, or from the Send Email Hook. See Transactional & triggered emails.
Why do my Supabase emails look broken in Outlook?
Outlook on Windows renders with Word’s engine, which ignores modern CSS. Use table layouts, inline CSS, and MSO conditional comments around buttons. See the inline-CSS reality.
How do I test Supabase emails locally?
supabase start runs a local inbox catcher (Inbucket / Mailpit) so you can preview rendered templates before they hit a real inbox.
Can I translate / localise Supabase emails?
Practically, yes — through the Send Email Hook, where you branch on the user’s language at send time.
How many emails can Supabase send per hour?
The built-in sender is currently capped at about 2 messages per hour (and only to your project team’s addresses). Enabling custom SMTP raises the default to 30/hour, which you can then increase on the Rate Limits page up to your provider’s limits.
 GN
GN